


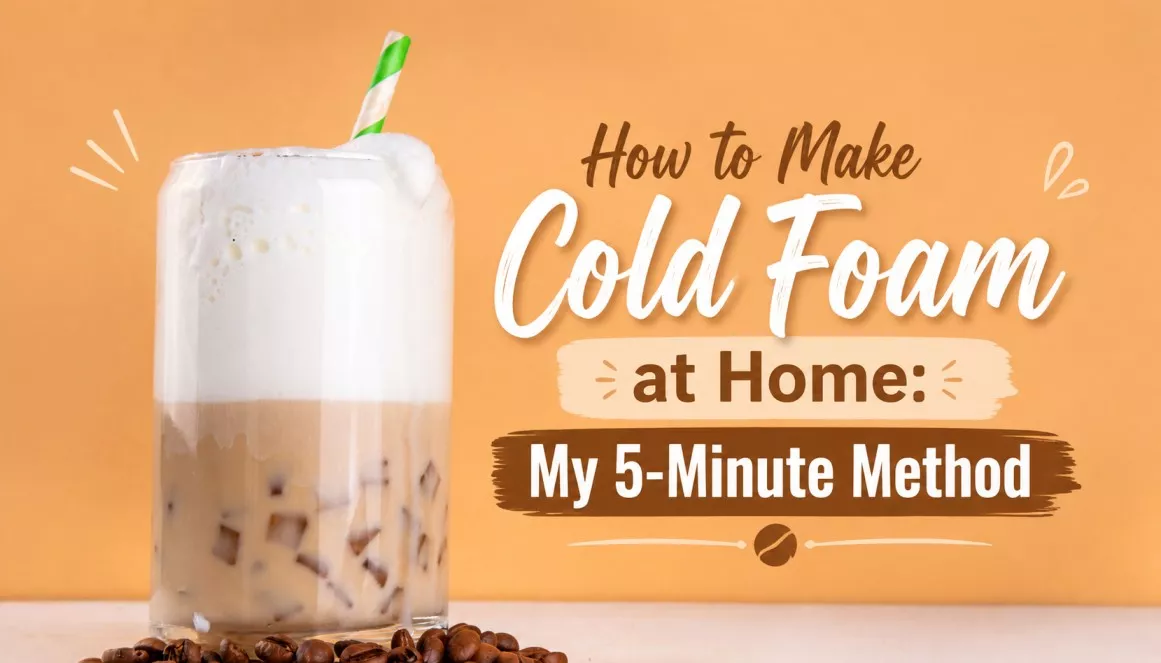
How to Make Cold Foam at Home: My 5-Minute Method
Key Takeaways
- Cold foam is frothed cold milk—not heated—making it ideal for iced drinks.
- Nonfat milk creates the thickest, longest-lasting foam; oat milk is the best dairy-free alternative.
- You don’t need a frother—a mason jar, French press, or blender all work beautifully.
- Homemade cold foam costs a fraction of what coffee shops charge.
- Foam lasts up to 30 minutes on a drink; refrigerate unused foam for up to 24 hours.
Introduction
There’s that moment—you pick up your iced coffee, take the first sip through the dense, creamy layer of cold foam sitting on top, and it genuinely feels like you’re at a café. Then you look at the receipt: $7.50 for a cold brew. Ouch.
I started making cold foam at home about three years ago after doing the math: two cold foam drinks a week was costing me nearly $800 a year. That’s a flight to somewhere warm. A really good espresso machine. Or, you know, just money I didn’t need to spend.
Here’s the good news—cold foam is surprisingly simple to make, takes about five minutes, and can be customized in ways your local coffee shop would charge extra for. In this guide, I’ll walk you through everything I’ve learned: the best milk to use, foolproof methods with and without a frother, a copycat vanilla sweet cream recipe, dairy-free options, and troubleshooting tips that took me months of trial and error to figure out.
Whether you’re a total beginner or already comfortable behind a home espresso setup, by the end of this article you’ll be making cold foam that rivals anything in the drive-through line.
What Is Cold Foam?
Cold foam is exactly what it sounds like: milk that’s been frothed cold, without any heat applied. Unlike steamed milk foam on a latte, cold foam is made at refrigerator temperature and sits on top of iced drinks rather than blending into them.
The texture is lighter and more velvety than whipped cream—it’s somewhere between a cloud and a mousse. It doesn’t have the heavy, rich density of whipped cream, and it won’t make your drink feel like dessert. Instead, it adds a smooth, slightly creamy layer that slowly folds into the coffee as you sip, delivering a little sweetness and creaminess with each pull of the straw.
Cold foam vs. whipped cream: Whipped cream is made from heavy cream agitated until it traps air in fat molecules. Cold foam is made from low-fat milk (usually) where air is trapped using protein structures instead. The result is a lighter, less greasy texture that holds its shape on cold drinks without immediately melting.
Coffee shops love cold foam because it’s visually striking, adds perceived value, and can be flavored in endless ways—all at a very low ingredient cost. That last part is exactly why it’s so worth making at home.
Why I Started Making Cold Foam at Home
My cold foam journey started out of pure stubbornness. I’d ordered a vanilla sweet cream cold brew three days in a row, and on the fourth day I stood in line and thought: there is no way this is complicated.
It wasn’t. After a few attempts, I was making cold foam that was arguably better than what I’d been buying—sweeter when I wanted it sweeter, less sweet when I didn’t, and with flavors I actually chose.
The real reasons to make it at home:
- Cost: A batch of cold foam costs under $0.25 in ingredients. Coffee shops charge $1–$2 as an add-on.
- Convenience: If you’re already making iced coffee at home, adding cold foam takes five extra minutes.
- Ingredient control: You know exactly what’s going in—no mystery syrups, no additives.
- Customization: Want brown sugar cinnamon foam? Pumpkin spice? Lavender honey? You can do it.
- No line: This one speaks for itself.
Ingredients You Need
You don’t need much to make excellent cold foam. Here’s a breakdown of the core ingredients and what each one does:
| Ingredient | Purpose | Recommended Amount |
|---|---|---|
| Nonfat milk | Best foam structure; creates thick, stable foam | 3–4 tablespoons |
| Whole milk | Richer, creamier foam; slightly less voluminous | 3–4 tablespoons |
| Oat milk (barista blend) | Dairy-free foam with good body | 3–4 tablespoons |
| Almond milk (unsweetened) | Light dairy-free option; thinner foam | 3–4 tablespoons |
| Vanilla syrup | Primary flavoring and sweetness | 1–2 teaspoons |
| Simple syrup | Neutral sweetness without flavor | 1 teaspoon |
| Powdered sugar | Slight sweetness + stabilizes foam | ½ teaspoon |
| Heavy cream | Adds richness to nonfat milk blends | 1 tablespoon optional |
The magic ingredient that most beginner guides skip: a small splash of heavy cream added to nonfat milk gives you the foam structure of skim milk and the richness of whole milk. That’s the secret behind most coffee-shop cold foam recipes, including the Starbucks sweet cream version.
The Best Milk for Cold Foam
Milk selection is the single biggest factor in foam quality, so it’s worth understanding why different milks behave differently.
Foam is created when air gets trapped in liquid. In dairy milk, proteins (primarily casein and whey) form a film around air bubbles and hold them in place. Fat actually weakens this structure, which is why nonfat milk—counterintuitively—makes better foam than whole milk.
| Milk Type | Foam Quality | Flavor | Best Use |
|---|---|---|---|
| Nonfat (skim) | ★★★★★ | Neutral, clean | Classic cold foam; best for flavored versions |
| 2% milk | ★★★★☆ | Slightly creamy | All-purpose; good balance |
| Whole milk | ★★★☆☆ | Rich, full | Creamier foam; pairs well with bold coffees |
| Oat milk (barista) | ★★★★☆ | Slightly sweet, oat-forward | Best dairy-free option |
| Almond milk | ★★☆☆☆ | Nutty, thin | Works in a blender; not ideal with frother |
| Soy milk | ★★★☆☆ | Mild, slightly beany | Decent foam; best with flavored syrups |
| Coconut milk (canned) | ★★☆☆☆ | Tropical, rich | Better whipped than frothed |
My recommendation: For classic cold foam, nonfat milk is your best bet every time. For a richer result, use 2 tablespoons nonfat + 1 tablespoon heavy cream. For dairy-free, go with a barista-edition oat milk—the added oils and stabilizers are specifically formulated to help it foam.
My 5-Minute Homemade Cold Foam Method

This is the method I use daily. It works with a handheld milk frother (they cost about $8–$12 and are worth every cent), and it produces café-quality foam consistently.
What you need: Handheld milk frother, small jar or tall cup, cold milk, flavoring
Step 1: Measure Your Ingredients (30 seconds)
Pour 3–4 tablespoons of cold nonfat milk into a small jar or cup. If you want richer foam, replace 1 tablespoon of nonfat with heavy cream. The milk must be cold—straight from the fridge. Warm milk will not foam properly with this method.
Pro tip: A narrow, tall container works better than a wide bowl. The height lets the frother circulate more efficiently.
Step 2: Add Flavoring (15 seconds)
Add 1–2 teaspoons of vanilla syrup (or your flavoring of choice) directly to the milk before frothing. Mixing flavor in before frothing distributes it evenly throughout the foam, rather than just sitting on top.
Pro tip: Start with less syrup than you think you need. You can always add more, but over-sweetened foam is hard to fix once it’s frothed.
Step 3: Froth the Milk (60–90 seconds)
Submerge the frother just below the surface of the milk and turn it on. Move it slowly up and down and in small circles. You’ll see the volume grow quickly—usually doubling in about 30 seconds.
Keep going until the foam is thick and holds soft peaks when you lift the frother. Total frothing time: 45–90 seconds depending on your frother’s power.
Visual cue: The foam should look like softly whipped cream—opaque, billowy, with no large bubbles visible on the surface.
Step 4: Check Consistency (15 seconds)
Tilt the container slightly. Good cold foam should hold its shape for at least 5–10 seconds before beginning to settle. If it slides around like thin liquid, froth for another 20–30 seconds. If it’s extremely stiff and grainy, you’ve gone a bit too far—it’ll still taste fine but will be harder to pour.
Step 5: Pour Over Coffee (30 seconds)
Prepare your iced coffee in a glass, then hold a spoon just above the surface of the drink and pour the cold foam slowly over the back of the spoon. This helps the foam settle gently on top rather than sinking through the ice.
The result: a clean, defined layer of cold foam sitting beautifully on your iced coffee. Dust with cinnamon or cocoa powder if you’re feeling fancy.
Total time: under 5 minutes.
How to Make Cold Foam Without a Frother
No frother? No problem. Here are four methods that work well with equipment you probably already own.
Mason Jar Method
Instructions: Pour cold milk and flavoring into a mason jar, filling it no more than halfway. Seal the lid tightly. Shake vigorously for 45–60 seconds until the volume roughly doubles.
Pros: No equipment needed; portable; easy cleanup
Cons: More physical effort; foam is slightly less refined
Time: About 2 minutes
Result: Good, slightly coarser foam. Works best with nonfat milk.
French Press Method
Instructions: Pour cold milk into a French press. Pump the plunger up and down rapidly for 60–90 seconds. The fine mesh aerates the milk beautifully.
Pros: Creates exceptionally smooth foam; most similar to frother results
Cons: Requires a French press; more cleanup
Time: About 2–3 minutes
Result: Excellent. This is the best no-frother method.
Blender Method
Instructions: Add cold milk and flavoring to a blender. Blend on high for 20–30 seconds. The foam will be voluminous but slightly airy.
Pros: Fast and easy; handles dairy-free milks well
Cons: Foam is less stable and may include larger bubbles; loud
Time: Under 1 minute
Result: Works well for plant-based milks that struggle with other methods.
Hand Whisk Method
Instructions: Pour cold milk into a wide bowl and whisk vigorously in a circular motion for 2–3 minutes until foam forms.
Pros: Zero equipment required
Cons: Takes real effort and time; results vary significantly
Time: 3–5 minutes
Result: Decent in a pinch; nonfat milk works best here.
Easy Vanilla Sweet Cream Cold Foam Recipe
This is the recipe that started my obsession—a homemade version of the vanilla sweet cream cold foam you’d find at a major coffee chain. The blend of nonfat milk and heavy cream is the key.
Ingredients:
- 2 tablespoons nonfat milk (cold)
- 1 tablespoon heavy cream (cold)
- 1–2 teaspoons vanilla syrup (or ½ teaspoon vanilla extract + ½ teaspoon simple syrup)
- Optional: tiny pinch of powdered sugar for added stability
Instructions:
- Combine all ingredients in a small jar or tall cup.
- Froth with a handheld frother for 60–90 seconds until thick and creamy.
- Check for soft peak consistency.
- Spoon or pour over cold brew, iced coffee, or iced latte.
Flavor notes: Lightly sweet with a clean vanilla warmth. The heavy cream gives it a silkiness that nonfat milk alone can’t achieve.
Serving suggestion: This is exceptional on cold brew or an iced americano. The boldness of those drinks plays beautifully against the sweet, creamy foam.
Dairy-Free Cold Foam Alternatives
Plant-based milks have come a long way, and a few of them foam really well.
Oat Milk (Best Overall): Barista-edition oat milks (Oatly Barista, Califia Farms Barista, MALK Oat) are specifically formulated with added oils and stabilizers that improve frothing dramatically. They produce smooth, creamy foam with a naturally sweet oat flavor. Use the blender or frother method.
Almond Milk: Thinner and nuttier, almond milk creates lighter foam that dissipates faster. Best used in the blender method. Opt for an unsweetened barista blend if available.
Coconut Milk (Full-Fat, Canned): Better whipped than frothed. Scoop the solid cream from a chilled can of full-fat coconut milk and whip it—you’ll get a rich, tropical foam. It doesn’t froth well from a carton.
Soy Milk: Surprisingly decent foam, especially with a frother. It has enough protein to hold bubbles reasonably well. The flavor can be slightly beany, so flavored syrups help. Use original or unsweetened.
General tip for dairy-free foam: Always use cold liquid, always use a barista or “extra creamy” blend when available, and the blender method tends to work better than a frother for most plant milks.
Common Cold Foam Mistakes and How to Fix Them
Even with simple ingredients, a few things can go wrong. Here’s what I’ve run into and how to fix it:
Foam collapses immediately Cause: Milk is too warm, or wrong milk type. Fix: Ensure milk is fridge-cold. Switch to nonfat or 2% milk. Add a small pinch of powdered sugar, which helps stabilize the foam.
Large, uneven bubbles Cause: Frother moved too fast or stayed in one position. Fix: Move the frother slowly and deliberately—up and down, and in gentle circles. The motion should be calm, not aggressive.
Foam is too thin Cause: Not enough frothing time, or too much liquid. Fix: Froth longer (up to 90 seconds). Use less milk—3 tablespoons is usually plenty.
Over-frothed, grainy foam Cause: Frothed too long; foam has separated. Fix: Unfortunately, this batch is done. Start over and watch for soft peak consistency rather than stiff peaks.
Foam sinks into the drink Cause: Foam poured too quickly or forcefully. Fix: Use the back-of-spoon technique. Make sure the foam is thick enough before pouring—it should hold a mound shape.
Too sweet Cause: Too much syrup added before frothing. Fix: Add flavoring conservatively and taste before frothing. 1 teaspoon is usually enough for a 3-tablespoon milk portion.
Creative Cold Foam Flavor Variations
Once you’ve mastered basic cold foam, the flavor possibilities are genuinely exciting. Here are my favorites:
Vanilla — Classic. 1–2 tsp vanilla syrup. Pairs with everything.
Caramel — 1 tsp caramel sauce + a pinch of sea salt. Best on iced lattes or cold brew.
Mocha — 1 tsp chocolate syrup + 1/4 tsp espresso powder. Incredible on iced mochas.
Pumpkin Spice — 1 tsp vanilla syrup + 1/4 tsp pumpkin spice blend. Seasonal and cozy.
Cinnamon Honey — 1 tsp honey + a small pinch of cinnamon. Stir honey into milk first; it mixes better before frothing.
Brown Sugar — 1 tsp brown sugar simple syrup + pinch of cinnamon. Rich and warming.
Chocolate Cream — 1 tsp chocolate syrup + 1 tbsp heavy cream. Decadent on iced coffee.
Lavender — 1 tsp lavender syrup. Floral and unusual; stunning on iced earl grey lattes.
Best Drinks to Pair with Cold Foam
Cold foam works best on drinks that have enough boldness to contrast the sweetness and creaminess on top.
- Cold brew: The gold standard pairing. Cold brew’s deep, smooth bitterness balances perfectly with sweet cream foam.
- Iced coffee: Bright and slightly acidic—vanilla foam smooths out the edges beautifully.
- Iced latte: Milk-forward drinks with foam on top feel rich without being heavy.
- Iced mocha: Mocha or chocolate cream cold foam turns this into a genuine treat.
- Nitro cold brew: Foam on nitro is a textural revelation—two layers of bubble, one fine and one coarse.
- Iced chai tea latte: Cinnamon honey or vanilla foam pairs extraordinarily well with spiced chai.
Drinks to avoid pairing with cold foam: Anything with a lot of ice movement (like heavily shaken drinks) or hot drinks, where the foam will melt immediately.
Storage and Make-Ahead Tips
Cold foam is best fresh—it’s at peak texture within the first 5–10 minutes after frothing. But if you want to make it ahead or save leftovers:
- Refrigerator storage: Transfer unused foam to an airtight container and refrigerate for up to 24 hours. The foam will partially deflate and settle into a frothy liquid.
- Re-frothing: Give stored foam a quick 20–30 second re-froth before use. It won’t be quite as thick, but it works.
- Make-ahead tip: You can premix your milk and flavoring in a sealed jar in the fridge for up to 3 days. Froth fresh when you need it—this saves significant time.
- Freshness indicators: If the stored foam smells sour or the milk has separated unusually, discard it. Standard milk freshness rules apply.
- For parties/batches: You can make a larger batch in a blender and keep it in the fridge in a sealed jar. Re-blend briefly before serving.
Frequently Asked Questions
Can you make cold foam without a frother?
Yes, absolutely. A French press gives the best results without a frother—pump the plunger vigorously for 60–90 seconds. A mason jar (shaken hard for a minute) and a blender also work well. The frother just makes it faster and more consistent.
What milk creates the thickest cold foam?
Nonfat (skim) milk makes the thickest, most stable cold foam. The lower fat content allows milk proteins to form stronger air-trapping structures. For richness without sacrificing stability, blend nonfat milk with a small amount of heavy cream.
Why does my cold foam disappear quickly?
Usually a combination of warm milk, too much fat content, or under-frothing. Use cold nonfat milk, froth until soft peaks form, and pour gently over your drink using a spoon to guide it.
Can I use plant-based milk?
Yes—oat milk (especially barista editions) works best. Soy milk is a decent second choice. Almond and coconut milks are more challenging but doable with a blender. Avoid rice milk; it doesn’t foam well at all.
Is cold foam healthier than whipped cream?
Generally, yes. Cold foam made from nonfat milk is significantly lower in fat and calories than whipped cream. A standard serving of cold foam adds roughly 20–35 calories versus 50–100+ for whipped cream. It also lacks the added sugars common in canned whipped cream.
How long does homemade cold foam last?
At peak quality, about 10–15 minutes on a drink. In the fridge in a sealed container, up to 24 hours (though it will deflate and need re-frothing).
Can cold foam be made ahead of time?
You can premix the milk and flavorings ahead, but froth fresh for best results. If you must make foam ahead, refrigerate it and re-froth for 20–30 seconds before use.
What sweeteners work best in cold foam?
Liquid syrups (simple syrup, vanilla syrup, caramel syrup) blend most easily before frothing. Honey works but should be stirred vigorously into the milk first. Granulated sugar doesn’t dissolve well in cold milk—use powdered sugar if you want a dry sweetener.
Expert Tips for Café-Quality Cold Foam Every Time
After three years of daily cold foam, here’s what I’d tell my beginner self:
Temperature is non-negotiable. Cold foam requires cold milk. Even 10 minutes on the counter is enough to warm milk past the optimal frothing temperature. If your foam isn’t working, this is usually why.
Start with less than you think. Use 3 tablespoons of milk before working up to 4 or 5. Smaller volumes froth faster and more consistently.
The spoon technique changes everything. Pouring foam over the back of a spoon onto your drink keeps the foam layer clean and defined—it’s the difference between “looks homemade” and “looks like a coffee shop made it.”
Add flavor before, not after. Always mix syrups into the milk before frothing. Adding them on top of finished foam creates uneven sweetness and can collapse the foam.
Invest in a handheld frother. They cost $8–$12 and last for years. It’s genuinely the single best investment for your home coffee setup.
Nonfat milk is your starting point; heavy cream is your upgrade. Once you’re comfortable with plain nonfat foam, try the 2-tablespoon nonfat + 1-tablespoon heavy cream combination for a richer, more indulgent result.
Match foam sweetness to your drink. If you’re putting foam on a sweet iced latte, use less syrup in the foam. If your drink is bold and bitter (cold brew, americano), you can be more generous with sweetener.
Conclusion
Making cold foam at home is one of the easiest ways to genuinely elevate your daily coffee without spending much time or money. The five-minute method I’ve described here—cold nonfat milk, a splash of flavoring, a handheld frother—produces results that honestly rival what you’d pay $2 extra for at a coffee shop.
You’ll save money, customize flavors you can’t get anywhere else, and have the satisfaction of a beautifully layered iced drink made entirely by you.
Start with the classic vanilla sweet cream recipe and get comfortable with the process. Then experiment—brown sugar cinnamon foam on cold brew, mocha foam on an iced latte, lavender foam on an iced earl grey. There are no wrong answers here, only delicious experiments.
Your best iced coffee is the one you make yourself. Now go froth something.


